Create a Snowflake Backed Depot Environment
Download the latest Depot CLI (make sure you get the release binary, not the codebase). We package the CLI as an executable binary. This guide is written using this specific version.
We assume your AWS account is using Depot release version 1.10.0 or higher.
Make the CLI executable after downloading. E.g. for linux distros:
#! /bin/bash
DEPOT_TARGET="/usr/local/bin/depot"
sudo mv ~/Downloads/depot-linux $DEPOT_TARGET
chmod +x $DEPOT_TARGET
depot --version
On macOS you will also need to go to Settings → Security and “Allow” the file the first time you run it.
Run depot cfg to create a basic depot CLI configuration file. (Stored in ~/.depotrc)
- Enter your AWS named profile you want to be the default for commands (some commands support the argument
--awsprofileif you want to target another profile other than your default) - Leave the other options blank for now
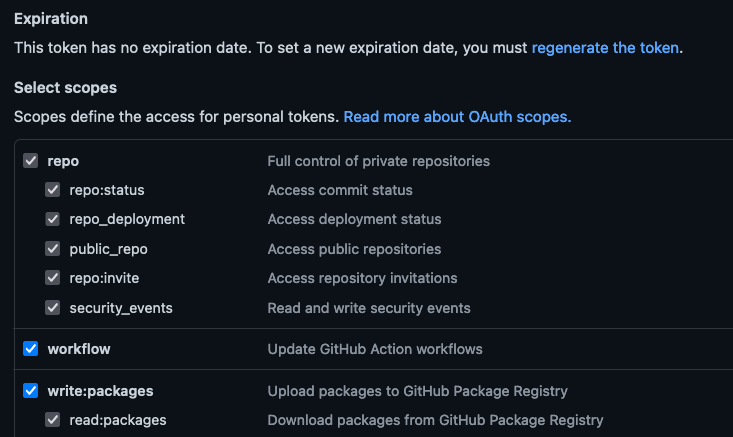
Create a GitHub personal access token for the Depot CLI to use with the following specific scopes set:
Export your GitHub access token so it is always available for the CLI to use. Make sure you automate this so new shell sessions will always have it available (or just always remember to set it before running Depot CLI commands that create projects, packages, or environments.
export GITHUB_TOKEN="ghp_xyz"
Create a Project
Creating a Depot project via create-project CLI command is no longer supported.
The rest of the tutorial might still be relevant.
Example Depot CLI command:
depot create-project --name "SeanSnowflakeProj1" --org my-github-org --repository-name sean-snowflake-project1 --awsprofile myprofile
A project secret is created in the AWS account holding your GitHub token. This is used for automated builds and source code access. A GitHub repository is created for your project.

Clone the new GitHub project and open it locally in your IDE. You’ll see some initial commits:

Create Environment
Your environment should be created in the same AWS account that you targeted when you created a Project.
The Depot CLI will create a branch off of ‘main’ dedicated to your environment. Your Depot environment will also be named according to this branch name. When you push changes to your environment branch, those changes will be sent and applied to the relevant Depot environment.
If you need any other workflow different to this, then you’re on your own and will need to customise and change the automated CodeBuild project and triggers according to your own requirements.
Create the environment, targeting your project you created earlier.
depot create-env --name=mydev --project SeanSnowflakeProj1 --org my-github-org --awsprofile myprofile

Your new environment is created as both a new branch in your code repository and a new CodeBuild project linked to it in your AWS account. The CodeBuild will be triggered to begin too.
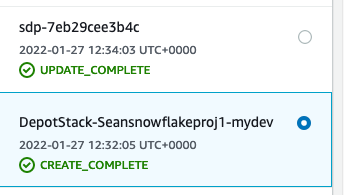
After some time (roughly 20-30 minutes) you should have a fully built Depot environment. You’ll see a parent stack for your Depot project environment stack, as well as the underlying Depot environment stack in CloudFormation.
At this point, it is worth pointing out that our default Depot environment template includes a DynamoDB / Athena storage setup with an EMR backend for transactions. Let’s change this to Snowflake only.
Clone your project’s GitHub repository if you haven’t already, and checkout your environment named branch. You’ll be removing the DynamoDB Location and EMR Spark Executor and replacing it with Snowflake equivalents.
nvm use
npm install
Create a Snowflake User for your Environment
You’ll first need to generate a public and private key. Do this locally on your own system, and use the outputs to create your Snowflake user and Snowflake Secrets Manager entry for your Snowflake Location.
openssl genrsa 2048 | openssl pkcs8 -topk8 -inform PEM -out exampleprivatekey.p8 -nocrypt
openssl rsa -in exampleprivatekey.p8 -pubout -out example.pub
Here is a script to create the Snowflake user, link the public key, and define a new Warehouse:
CREATE USER EXAMPLE_DEV_SEAN PASSWORD = 'SOME!password^HERE...'
LOGIN_NAME = 'EXAMPLE_DEV_SEAN'
DISPLAY_NAME = 'EXAMPLE_DEV_SEAN'
EMAIL = 'example@example.com'
DEFAULT_ROLE = "SYSADMIN"
MUST_CHANGE_PASSWORD = FALSE;
GRANT ROLE "SYSADMIN" TO USER EXAMPLE_DEV_SEAN;

ALTER USER EXAMPLE_DEV_SEAN SET rsa_public_key='PUB_KEY_DATA_GOES_HERE';

CREATE WAREHOUSE EXAMPLE_XS WITH WAREHOUSE_SIZE = 'XSMALL' WAREHOUSE_TYPE = 'STANDARD' AUTO_SUSPEND = 5 AUTO_RESUME = TRUE MIN_CLUSTER_COUNT = 1 MAX_CLUSTER_COUNT = 2 SCALING_POLICY = 'STANDARD';
GRANT MONITOR, OPERATE, USAGE ON WAREHOUSE EXAMPLE_XS TO ROLE SYSADMIN;
ALTER USER EXAMPLE_DEV_SEAN SET DEFAULT_WAREHOUSE = 'EXAMPLE_XS';
Your SQL query above will need the USER specific parts executed by an ACCOUNTADMIN
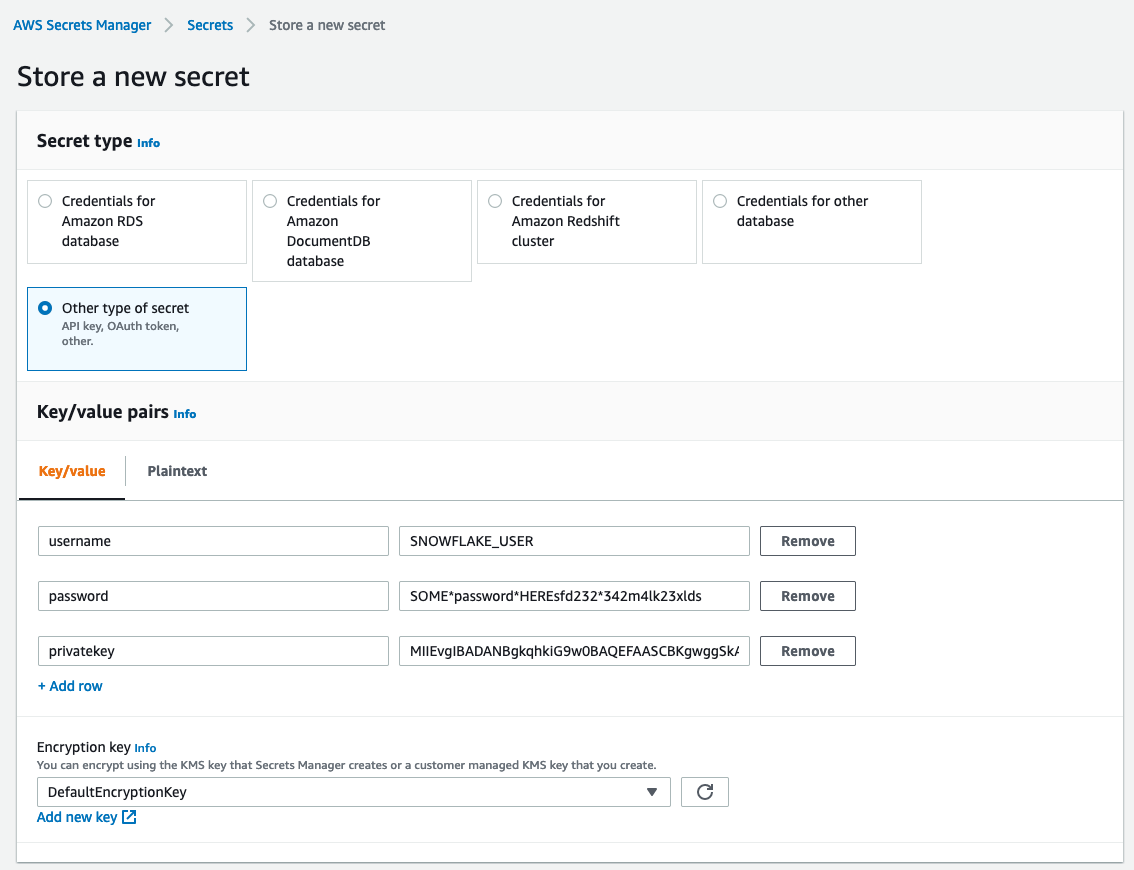
Store a new Secrets Manager secret with the fields username password and privatekey.
Your privatekey should be a single-line string without any private key header or footer text.
Add the Snowflake Depot CDK Code
Remove the DynamoDB Location and EMR Spark Executor code from your main environment’s lib/projectname.ts file.
Make a note of your newly created Secrets Manager secret ARN. You’ll use it for the new code added below.
Add a Snowflake Executor and Location. For example:
const executor = new Executor.Snowflake(stack, "Executor", {
    environment: depotEnvironment,
    name: "example-executor",
    credentials: {
        credentialsSecretArn: "arn:aws:secretsmanager:us-east-1:123456789012:secret:mysecret-123456",
        accountId: "123456789012",
        region: "eu-west-1"
    },
    warehouse: SnowflakeWarehouse.depotManaged({
        name: "EXAMPLE_WAREHOUSE",
        size: "XSMALL"
    })
});

const snowflakeLocation = new Location.Snowflake(stack, "SnowflakeLocation", {
    environment: depotEnvironment,
    name: "example-location",
    executor: executor,
    createEntities: true,
    writable: true,
    readable: true,
    strictMigrations: true
});
Remove any left over unused imports, check-in the newly generated package-lock.json, then save and commit + push to your environment branch.
Your environment CodeBuild project will run again and update your environment, removing the DynamoDB and EMR Spark related backend, and replacing it with your newly defined Snowflake items.
Wait for the environment stack in CloudFormation to stabilise, then you can proceed on to adding packages and datasets.
Add Package and a Dataset
Creating a Depot package via create-package CLI command is no longer supported.
The rest of the tutorial might still be relevant.
Depot CLI:
depot create-package --name mypack1 --org my-github-org
If you do not wish to have the CLI automatically create the new package repository remotely, add --local to the above command.
After the GitHub repository for mypack1 is created, clone it and open it in your IDE locally. Open a shell and initialise locally with:
nvm use
npm install
Adjust your package accordingly to setup your required schemas. Once pushed up to the remote repository GitHub actions will build a version of your package and publish it to the npm feed.
Install the package into your environment CDK project as a dependency. For example:
"dependencies": {
    "@my-github-org/mypack1": "1.0.1",
    "@stage-tech/depot-cdk": "2.0.0",
}
In your environment Stack TypeScript file, import the package:
import * as pkg from "@my-github-org/mypack1";
Create a Depot Package, and using that Package, create a Depot Dataset. Reference the previously defined depotEnvironment and snowflakeLocation:
const myPackage = new Package(this, "MyPackage", pkg);
const myDataset = new Dataset(this, "MyDataset", {
    environment: depotEnvironment,
    package: myPackage,
    name: "mydataset",
    location: snowflakeLocation
});
Save, commit and push your changes to your environment branch. Your environment CloudFormation stack will update (wait roughly 10 minutes).
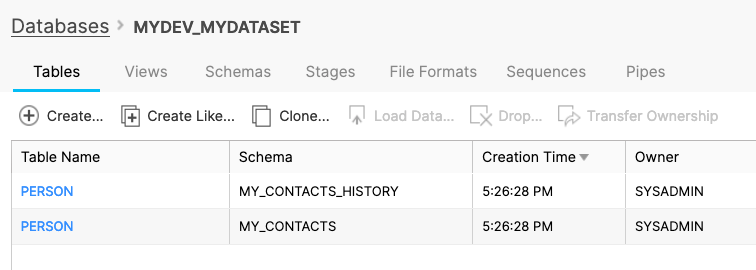
During the update, the Depot Snowflake integration will automatically create your Snowflake backing Database, with schemas according to your Depot Package.
Add Storage Integration and Stage
To load data from an external location you need to create a Storage Integration and a Stage for your Snowflake Database.
If you are setting the createEntities flag in your Snowflake Location to true, then an external S3 Storage Integration will
be created by Depot for you. A Stage pointing to your environment's data bucket will also be created and linked to this
Storage Integration.
Create a Storage Integration and set the allowed locations to *
CREATE STORAGE INTEGRATION EXAMPLE_STORAGE_INT
TYPE = EXTERNAL_STAGE
STORAGE_PROVIDER = S3
ENABLED = TRUE
STORAGE_AWS_ROLE_ARN = 'arn:aws:iam::123456789012:role/your-snowflake-access-role'
STORAGE_AWS_OBJECT_ACL = 'bucket-owner-full-control'
STORAGE_ALLOWED_LOCATIONS = ('*');
Next, create a Stage in your Snowflake Database and set it up to use the previously created Storage Integration. Set the Location to the location where your source data will reside.
CREATE STAGE "SEAN2_MYDATASET"."PUBLIC".EXAMPLE_STAGE
STORAGE_INTEGRATION = EXAMPLE_STORAGE_INT
URL = 's3://example-bucket/test1';
You can find more detail about creating Snowflake Integrations and Stages in the following places:
- Snowflake Account Setup
- CREATE STAGE
- Configuring a Snowflake Storage Integration to access Amazon S3
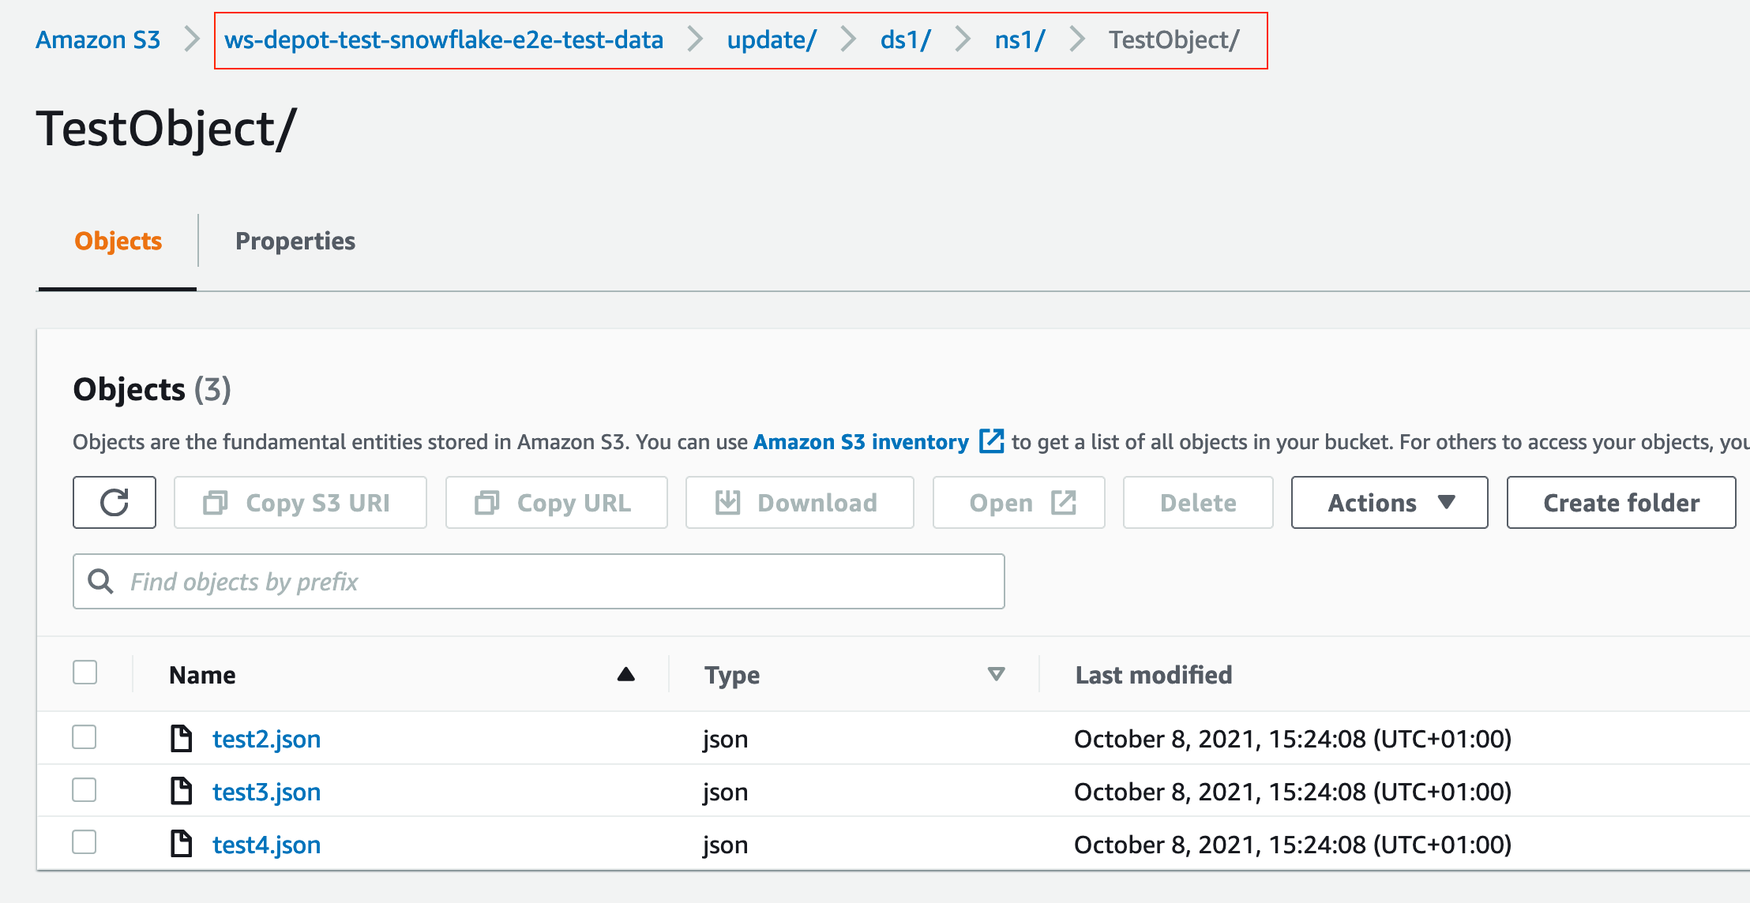
Object / File Placement in S3
This section is informational only. It shows an example of how objects for your Depot schema should be organised into your S3 location in order Depot Transactions to pick up source data.
- Place your input data in a key path that follows your schema name. For dataset
ds1and schemans1.TestObject, with a Stage present in your Database with Location set tows-depot-test-snowflake-e2e-test-data/updateyour data could be placed as illustrated in the screenshot below: